NetGear 夜鹰 RAX40V2 设备与固件分析 0x01 前言 NetGear 厂商的路由器设备中,拆解开经常会带有UART 调试串口,并且以往的NetGear 设备UART调试口往往只需要正确的检测出UART引脚的类型,设置波特率为115200,然后直接用串口调试软件配合FT232就可以直接获取设备内部的shell。但是Nightawk 夜鹰 RAX40V2 路由器在接入UART调试串口时,却有所不同。本篇文章,将带来对NetGear RAX40v2 在路由器开发板上的UART 获取shell的过程中遇到的一些问题,如何进行解决,循序渐进的开启设备的telnet,让我们拭目以待。
0x02 设备分析 产品名称:Nighthawk AX4 4-Stream WiFi Router
固件版本:V1.0.2.82_2.0.50
发布日期:2020年
首先我们从设备侧入手,拆解的过程以及设备硬件的配置,这不属于本片文章的重点,这里就不做过多的讲解。
0x03 设备串口分析 引脚分析,这款设备的引脚已经给了针脚,也免去了另外焊接针脚的工作,根据万用表和逻辑分析仪的识别(其实没用到逻辑分析仪)
从上到下依次是 VCC 引脚、GND引脚 (红线)、TXD引脚(黄线)、RXD引脚(橙线)
波特率识别
首先识别FTD 232 USB “ls -ll /dev/tty*”
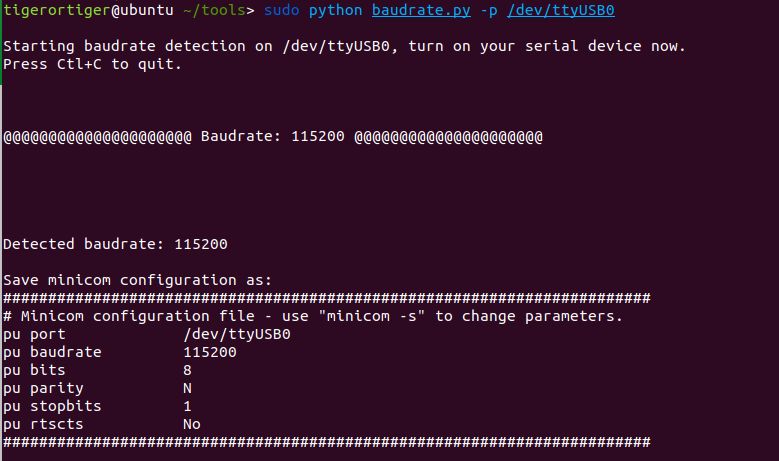
接下来使用devttys0 的小工具baudrate.py 来识别波特率,只需要简单的使用上下键,就可以识别不同的波特率。如下图所示,设备识别为115200。 这也是NetGear 常用的波特率,其他的厂商的波特率也很多使用这个波特率。
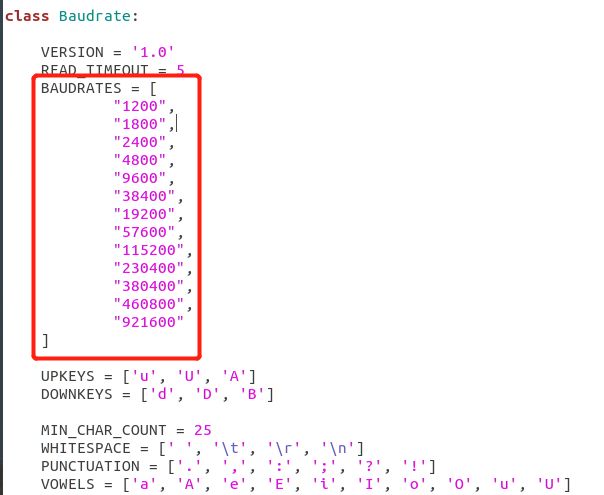
tip: 这里顺带提一下,baudrate.py 识别的波特率是设置好的常见波特率,但是里面只设置了几个可以识别的波特率,如果需要增加识别广度,需要在脚本内部的BAUDRATES 参数中增加想要识别的波特率值。
获取启动log
现在我们已经知道了波特率,接下来获取设备在启动的时候的log 信息,分析这些log 对设备分析有的时候会非常有用。但是常常 UART 的log 信息会非常多并且启动比较快。因此需要想办法将这些log 保存下来,以便后续分析。
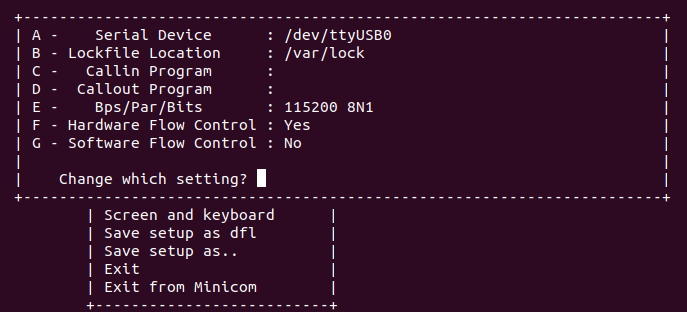
我们使用minicom 打开,选择 “Serial port setup” –> 设置 ”A—Serial Device“ 和 ”E “的波特率,minicom 使用的方法搜索一下有详细的使用说明。
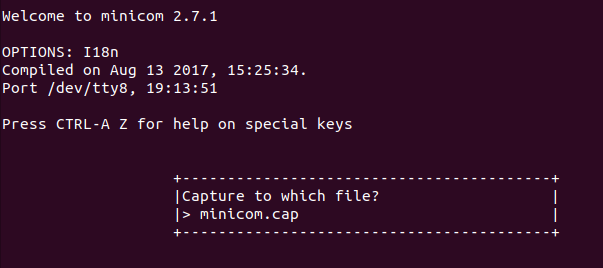
保存串口log 为文件,关闭也是一样的。最终可以看到生成的文件,文本编辑器打开生成的文件。
tips: 非正常关闭minicom,会在/var/lock下创建几个文件LCK*,这几个文件阻止了minicom的运行,将它们删除后即可恢复。
查看设备启动的log ,log 很多,这里截选了部分的log信息。
1
2
3
4
5
6
7
8
9
10
11
12
13
14
15
16
17
18
19
20
21
22
23
24
25
26
27
28
29
30
31
32
33
34
35
36
37
38
39
40
41
42
43
44
45
46
47
squashfs: version 4.0 (2009 /01 /31 ) Phillip Lougherversion 2.2 . (NAND) (SUMMARY ) © 2001 -2006 Red Hat, Inc.version 7.23 )with security attributes, no debug enableddefault )loop : module loadedfound , Manufacturer ID: 0xef , Chip ID: 0xda Unknown W29N02GV256 MiB, SLC, erase size: 128 KiB, page size: 2048 , OOB size: 64 to 0x6532845b timing_2 to 0x00091e94 256 MiB total, 128 KiB blocks, 2 KiB pages, 16 B OOB, 8 -bit , BCH-4 table found at page 131008 , version 0x01 table found at page 130944 , version 0x01 For primary mtd partition rootfs, cferam/vmlinux.lz UBI volume, vmlinux fs mounted as squash fs on UBI <<<<<partition rootfs_update detected as UBI for cferam/vmlinux source and UBIFS for vmlinux filesystem11 MTD partitions on "brcmnand.0":0x000000100000 -0x000006900000 : "rootfs"0x000006900000 -0x000006d00000 : "rootfs_update"0x000007f00000 -0x00000ff00000 : "data"0x000000000000 -0x000000100000 : "nvram"0x000000100000 -0x000006900000 : "image"0x000006900000 -0x000006d00000 : "image_update"0x000000000000 -0x000010000000 : "dummy1"0x000000000000 -0x000010000000 : "dummy2"0x000007a00000 -0x000007f00000 : "misc3"0x000007500000 -0x000007a00000 : "misc2"0x000006d00000 -0x000007500000 : "misc1"1.6 1999 -2004 Max Krasnyansky <maxk@qualcomm.com>version 2.4 .2 family 24 RESET due to HW reset RESET reason: 0x00000000 and Enabled130 : interrupt_id 22 130 : interrupt_id 23 130 : interrupt_id 24 130 : interrupt_id 25 3
接入UART调试口shell
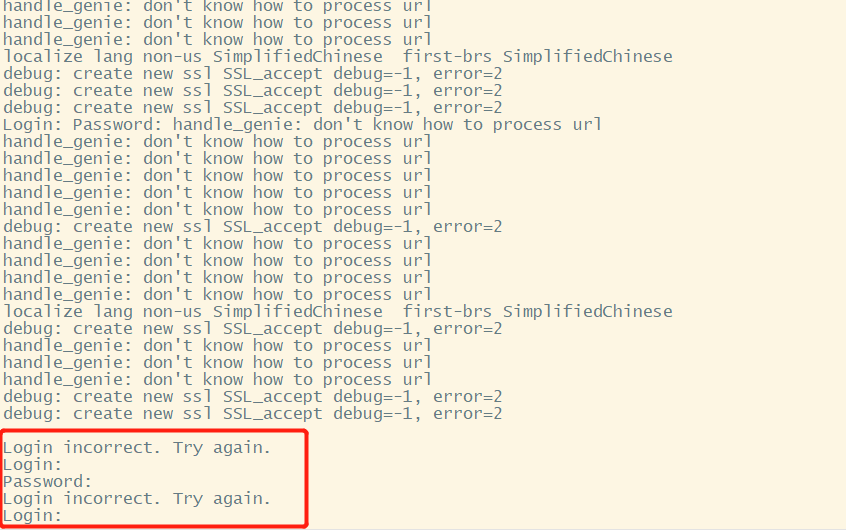
UART 接入,设置好波特率,重启设备,待设备系统启动完成,启动日志输出完之后,连接shell ,但是需要登录口令。
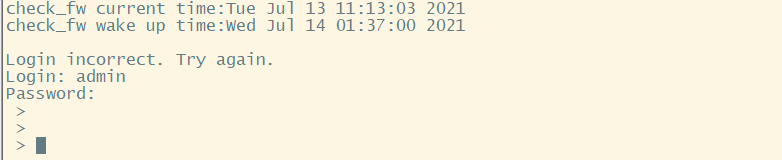
遇到这种方法,本打算尝试调整uboot在引导linux kernel时使用的启动参数(bootargs) 直接访问跟文件系统。但是我很幸运的使用弱口令进去之后,但是发现这是一个低权限的shell,并且支持的可执行的命令非常有限。
正当我一筹莫展的时候,想起了曾经看到的一款思科的设备的shell 也是类似这种低权限的shell,但是输入 “sh”、”\bin\sh” 、”bash” 等命令可以获取完整版的shell。很幸运,在我输入”sh” 之后,成功的获取了设备完整的shell,并且支持的可执行的命令也变多了。
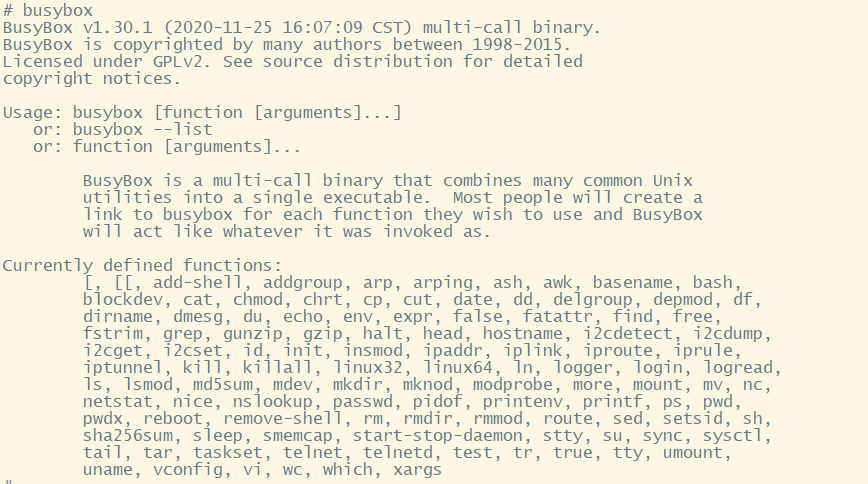
busybox
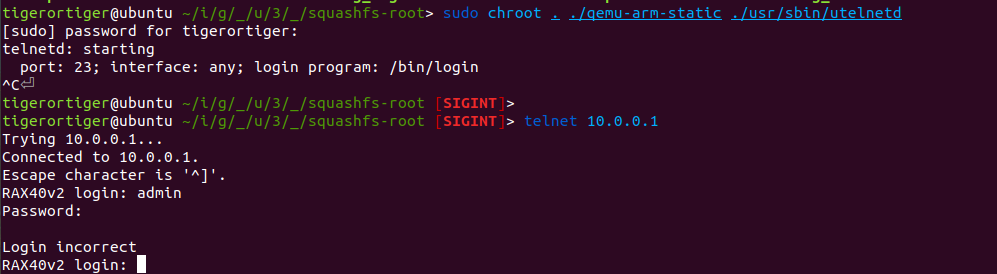
0x04 开启telnet 到这里我已经能通过UART串口获取设备的shell了,但是进入设备shell 过于复杂,并且我也不满足于UART的shell, 于是接着我尝试开启设备的ssh 、 telnet 的shell。我在测试的过程中,执行/bin/文件中的telnetd 毫无反应,并且执行busyBox 中的telnetd 也同样显示错误,我开始猜测开发者可能将telnetd做了更改,导致无法正常使用,但是我在 /usr/sbin/文件目录中找到了 utelnetd 可执行文件,并且执行后很明显的开启了23端口进行监听连接。然而一切都不如我所愿,进行登录的时候又显示需要登录口令,我尝试使用UART的弱口令和一些常见的口令也无法进入shell。
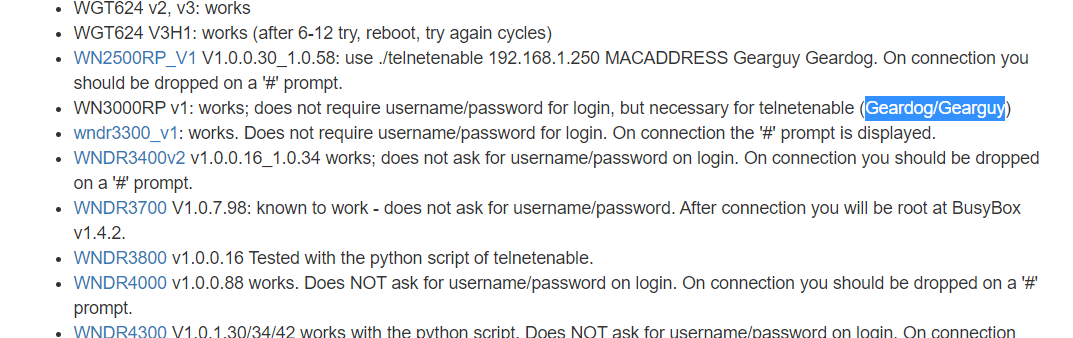
并且我使用google 搜索 NetGear 有没有历史的telnet 口令,在一个论坛中看到了一些信息,但是也依旧没有任何效果。
https://openwrt.org/toh/netgear/telnet.console
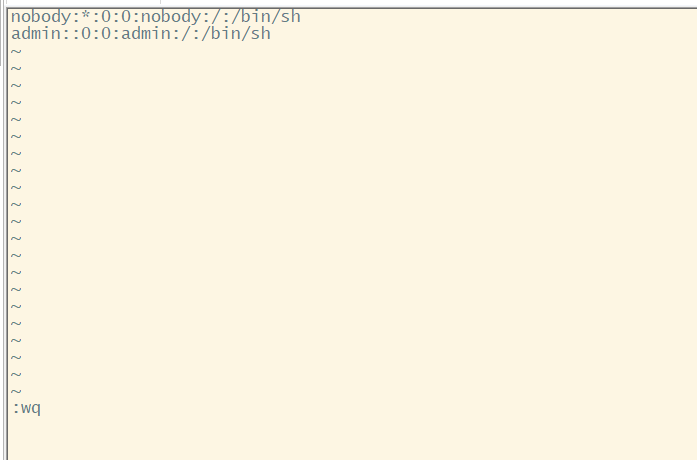
于是我打算通过UART提供的调试接口直接修改passwd 文件,因为是root 的权限,因此直接更改admin 用户的密码为空。
1 2 3 4 5 6 7 8 nobody: $1 $hFVKPORB $llSaVGwuSWo .CTxU5.Qk30: 0 : 0 :nobody :/ :/bin/sh admin: x: 0 : 0 :admin :/ :/bin/sh telnetd: startingport: 23 ; interface: any; login program: /bin/login
更改为如下图所示
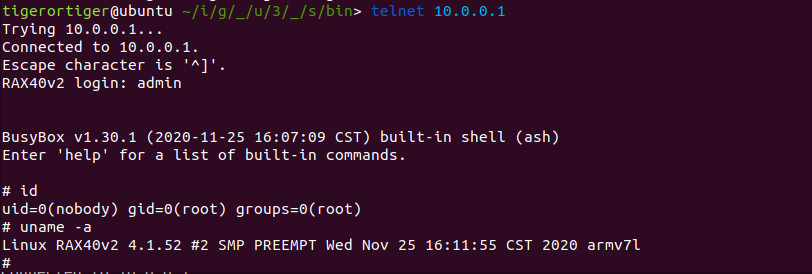
然后重新启动utelnetd 服务,使用telnet 连接在输入用户名admin 之后就可以直接获取到shell 。
0x05 固件提取 由于这款设备的是NetGear 的产品,设备固件都是可以直接下载来的,对这部分不感兴趣的直接跳过。
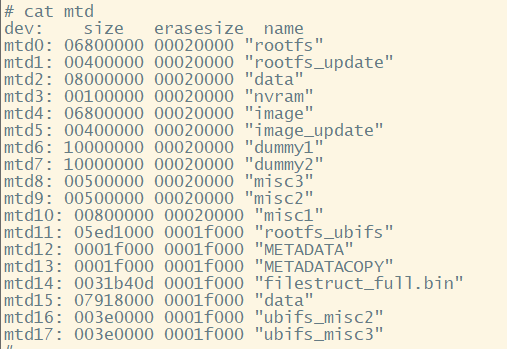
接下来开始提取设备内部的文件系统,根据前面的查看设备启动时的系统信息,并且配合设备内部的mtd信息分别,确定设备的文件系统是mtd11
使用dd 命令进行提取,在提取之前要确定空间使用的情况,以免文件太大,文件夹中放不下,如果文件太大,可以考虑将bin 文件进行压缩一下。
1 dd if =/dev/mtd11 of =/tmp/rootfs_ubifs.bin
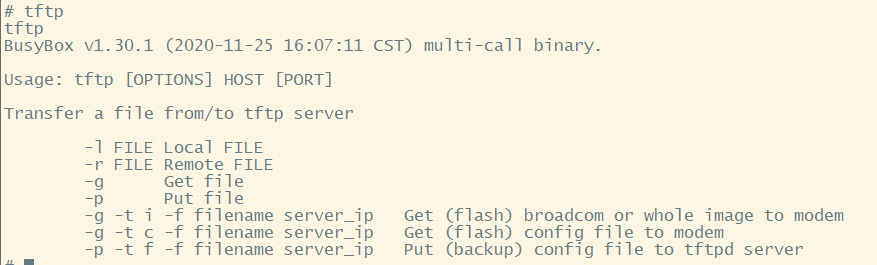
由于设备内有 tftp ,尝试使用tftp 来进行提取dd 转储的bin 文件,但是遗憾的是,tftp 上传文件到本地tftpd server 的文件是设备内部的配置信息。其他的命令也无法正常将文件提取到设备外部。所幸文件系统内部有可以使用的wget 命令,直接上传上传一个对应架构的完整版busybox 到其中,使用完整版的tftp 将文件传出来即可。
1 tftp -p -t -f rootfs_ubifs.bin 172.15.0.2
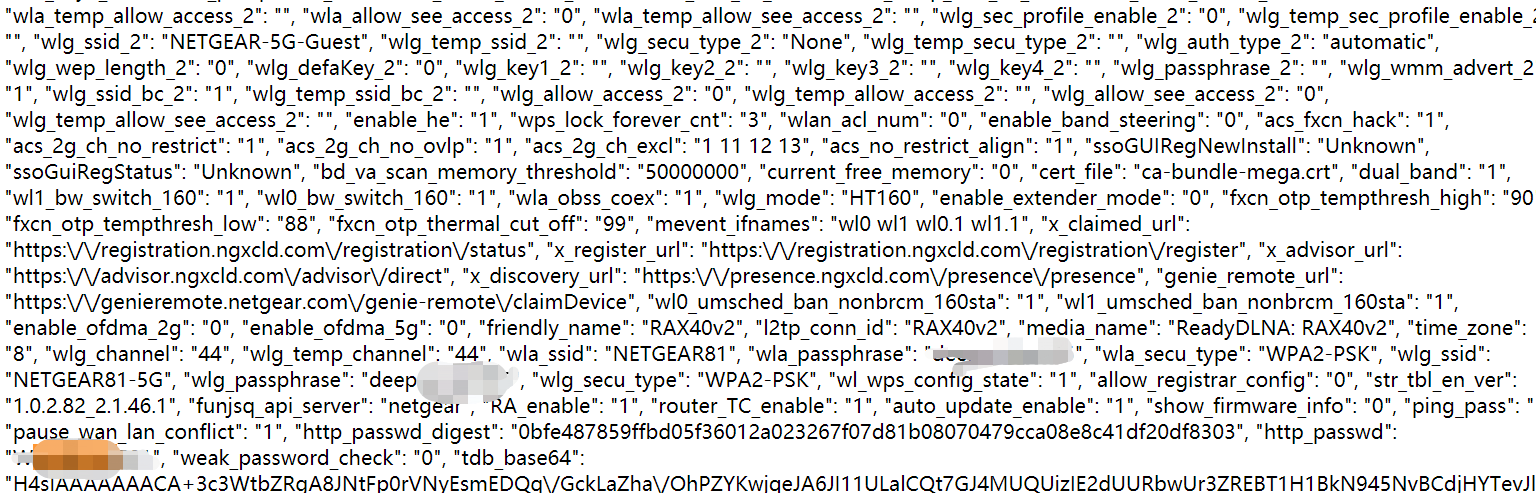
再接下来我们提取设备的非易失性存储器NVRAM(断电之后,所存储的数据不丢失的随机访问存储器)。先将nvram的信息保存,然后使用buybox 的ftp 上传到本地中。
1
2
# nvram show > nvram.bin # strings nvram.bin > nvram.html
成功提取,这里的 WiFi密码和web 管理界面的口令都没有加密,但是路由器忘记密码更改密码的答案给加密了。
0x06 固件解包 上面讲述了如何提取设备的固件,但是NetGear 设备固件是开放了,直接去NetGear 官网下载即可。
下载完成之后,这是一个用 .chk 拓展名为结尾的NetGear 固件镜像,那么使用binwalk 查看一下固件包
使用binwalk -Me 解开固件包,解开固件包之后,可以看到有两个东西, 3A.ubi 文件和 ubifs-root 文件夹, 本以为固件中的文件系统提取到了ubifs-root 中,可以 ubifs-root 文件内没有任何东西。把关注点放在3A.ubi 文件上。
解开ubi 文件有两种方法,一个是通过挂载的方式, 一个是使用 ubi_reader 套件来解开,挂载的话过于麻烦,这里使用 ubi_reader 套件来解开. 我们需要https://github.com/jrspruitt/ubi_reader,可以通过PIP进行安装:`sudo pip install ubi_reader`, 使用 ubireader_extract_images 来进行解开ubi 的文件。
1 ubireader_extract_images 3 A.ubi
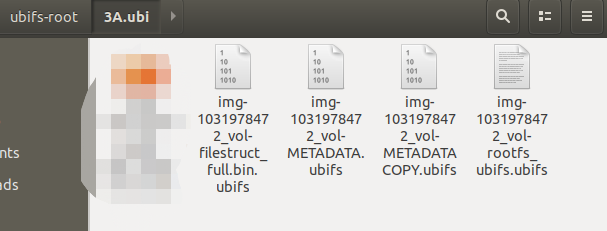
解开之后 ubifs-root 文件内会生成四个ubifs 的文件
根据前面对设备启动时的系统信息分析,rootfs_ubifs.ubifs 就是固件的文件系统。
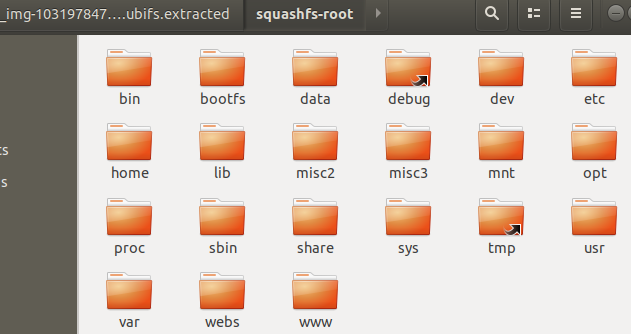
使用binwalk 进行分析, 识别出来是squashfs 文件系统, 看样子是可以使用binwalk 解开固件
成功解开
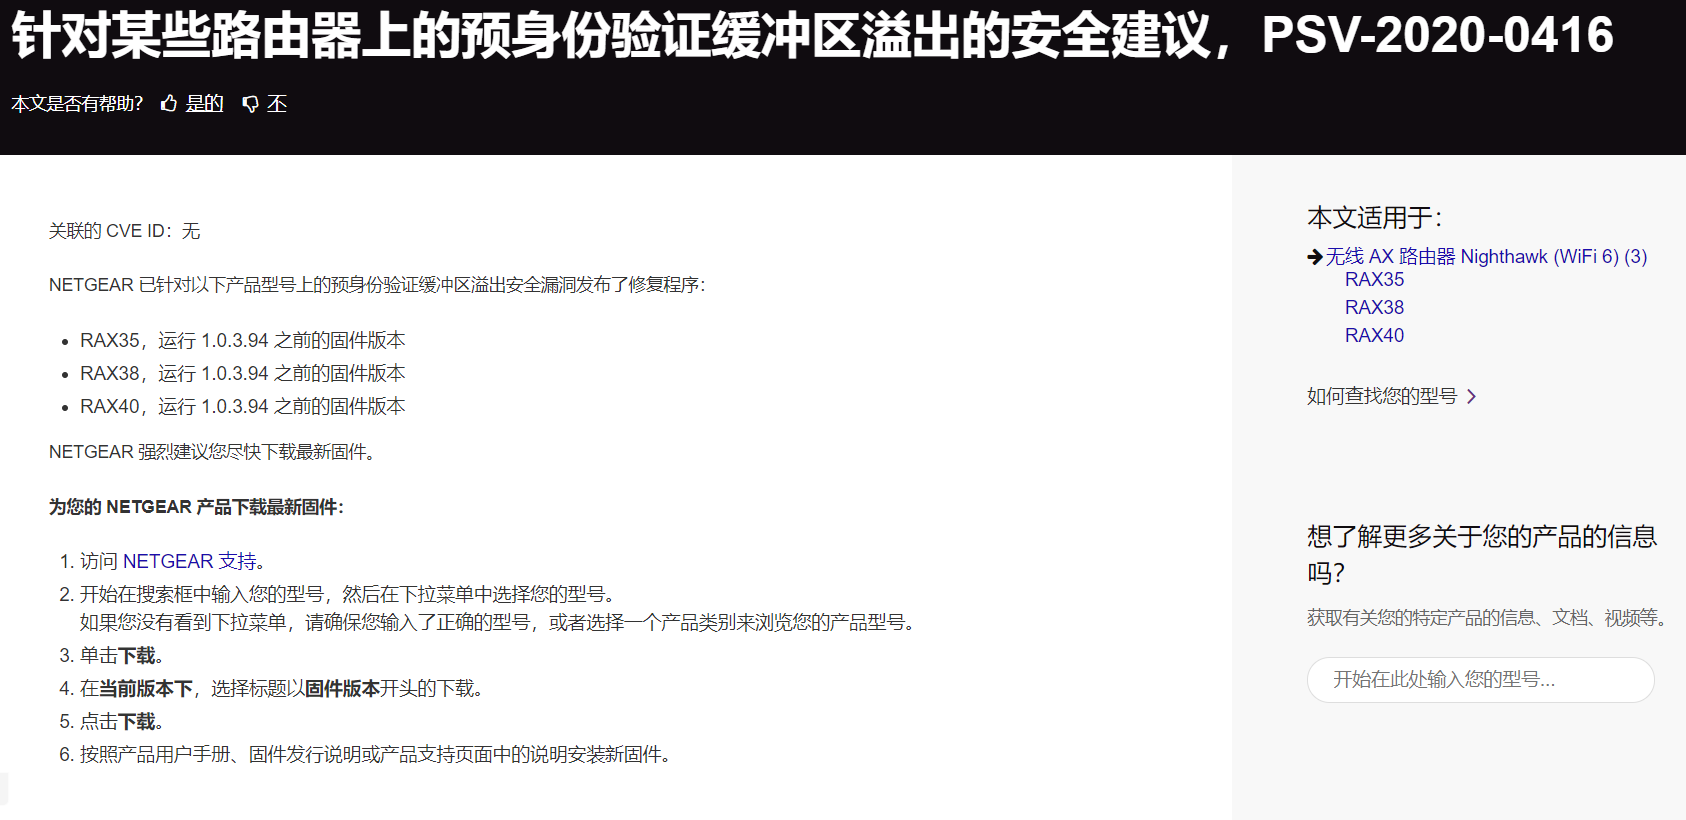
RAX40 公开的漏洞信息
1 day 发现,漏洞挖掘方法
通过固件比对的方式来进行固件分析
https://pup2y.github.io/2020/09/18/2020-qiang-wang-bei-jue-sai-cisco-lu-you-qi/
通过bindiff 对两个版本程序进行对比,从而对漏洞进行定位
https://www.anquanke.com/post/id/200087
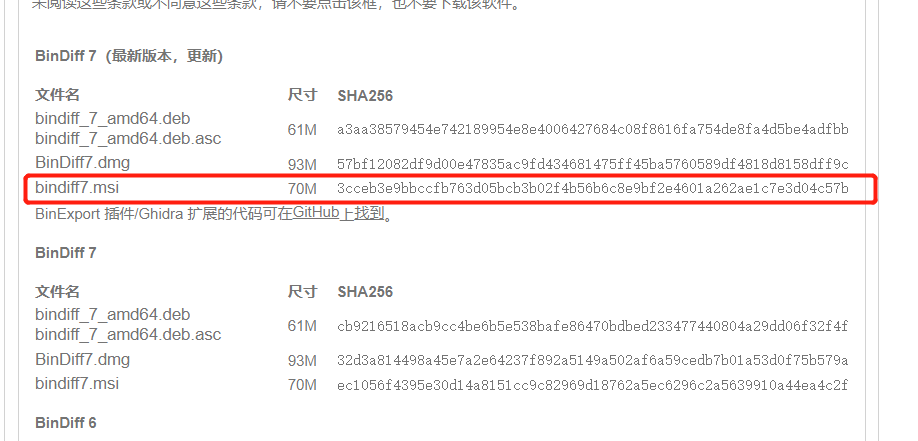
安装bindiff 工具 (一) 、首先去官方下载,需要翻墙
https://www.zynamics.com/software.html
window 10 可以下载
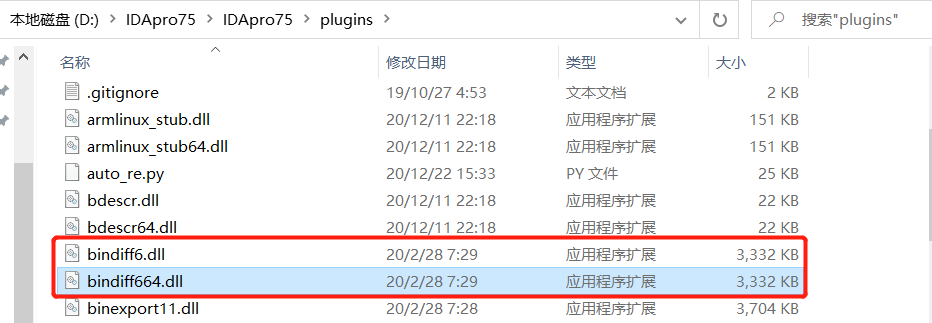
(二)、安装就好了,唯一要注意的是在自定义安装路径的时候,选在IDA的路径就好,我的安装路径是 (D://IDApro75/IDApro75/)
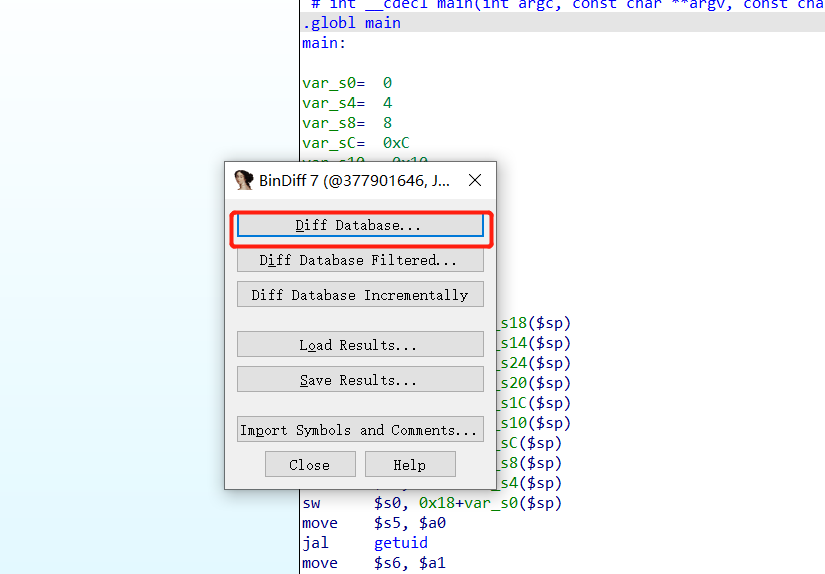
如何使用bindiff (一)、用IDA 打开你要对比分析的两个二进制程序,然后保存为 .ida (.ida64) 的格式。(注意:二进制程序保存的路径一定要是纯英文路径,不然会显示 “Error while diffing: Export of the secondary database failed: File not found”)。
(二)、打开一个二进制程序,然后快捷键Ctrl + 6 ,打开BinDiff,点击”Diff Database…”,选择将要进行对比分析的另一个二进制程序,加载进来就好。
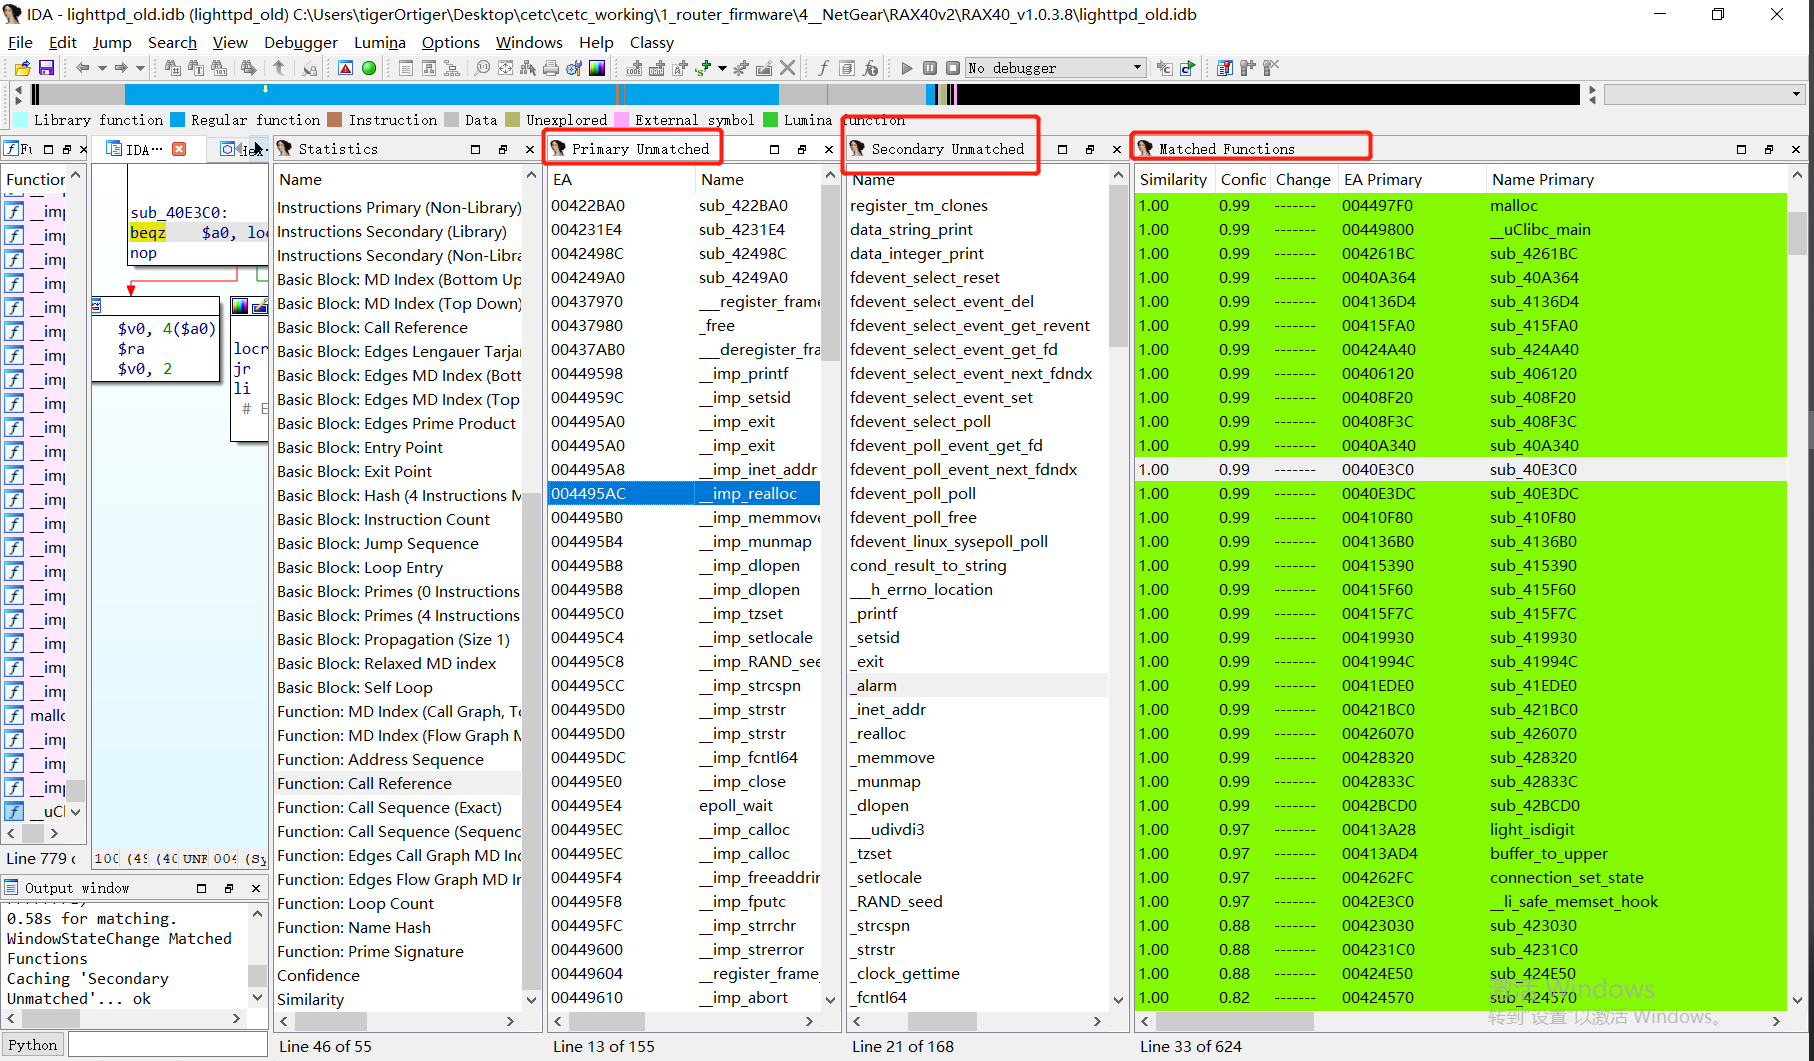
(三)最终的界面如下图所示,增加了四个栏目
Prinary Umatched: 主文件没有匹配的函数
Secondary Unmatched : 对比文件中没有匹配的函数
Matched Functions : 表示两个文件的相似度,相似度从高到低排,相似度为 1 ,则表示两个文件高度相似的函数,值越低,说明改动越大。
然后使用bindiff.exe 创建workspce , 打开文件
分析
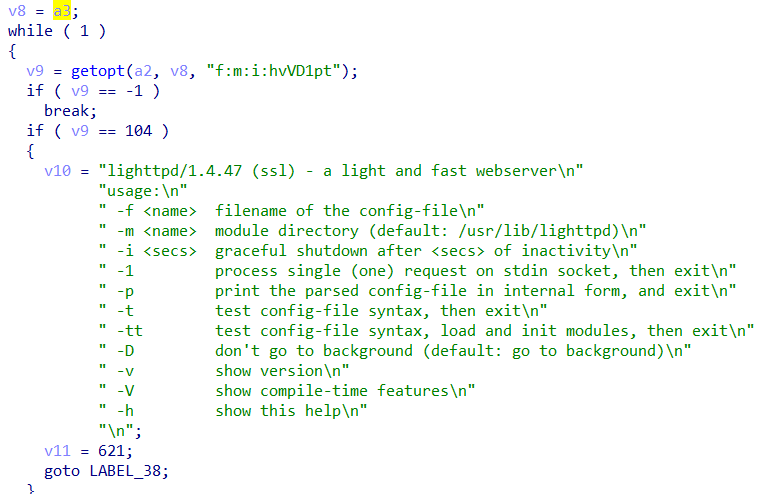
进入这个函数
结合 lighttpd5.conf 文件中的命令,可以推断出lighttpd的配置文件的路径。
查看 lighttpd5.conf 调用的地方,显示在 /etc/init.d/lighttpd5 中调用,结合上面的命令,可以知道系统在启动的时候,会启动 lighttpd 的服务。
lighttpd 相关学习 根据RAX40 lighttpd 的逆向,了解到lighttpd 的版本为1.4.47
https://git.lighttpd.net/lighttpd/lighttpd1.4/src/tag/lighttpd-1.4.47
主要的配置文件 lighttpd.conf 下面的文件来自于RAX40 固件中的配置文件。
1
2
3
4
5
6
7
8
9
10
11
12
13
14
15
16
17
18
19
20
21
22
23
24
25
26
27
28
29
30
31
32
33
34
35
36
37
38
39
40
41
42
43
44
45
46
47
48
49
50
51
52
53
54
55
56
57
58
59
60
61
62
63
64
65
66
67
68
69
70
71
72
73
74
75
76
77
78
79
80
81
82
83
84
85
86
87
88
89
90
91
92
93
94
95
96
97
98
99
100
101
102
103
104
105
106
107
108
109
110
111
112
113
114
115
116
117
118
119
120
121
122
123
124
125
126
127
128
129
130
131
132
133
134
135
136
137
138
139
140
141
142
143
144
145
146
147
148
149
150
151
152
153
154
155
156
157
158
159
160
161
162
163
164
165
166
167
168
169
170
171
172
173
174
175
176
177
178
179
180
181
182
183
184
185
186
187
188
189
190
191
192
193
194
195
196
197
198
199
200
201
202
203
204
205
206
207
208
209
210
211
212
213
214
215
216
217
218
219
220
221
222
223
224
225
226
227
228
229
230
231
232
233
234
235
236
237
238
239
240
241
242
243
244
245
246
247
248
249
250
251
252
253
254
255
256
257
258
259
260
261
262
263
264
265
266
267
268
269
270
271
272
273
274
275
276
277
278
279
280
281
282
283
284
285
286
287
288
289
290
291
292
293
294
295
296
297
298
299
300
301
302
303
304
305
306
307
308
309
310
311
312
313
314
315
316
317
318
319
320
321
322
323
324
325
326
327
328
329
330
331
332
333
334
335
336
337
338
339
340
341
342
343
344
345
346
347
348
349
350
351
352
353
354
355
356
357
358
359
360
361
362
363
364
365
366
367
368
# lighttpd configuration file # ## modules to load # all other module should only be loaded if really neccesary # - saves some time # - saves memory # 选择需要用到的模块 # "mod_rewrite" , # "mod_redirect" , "mod_alias" ,"mod_auth" ,# "mod_status" , "mod_setenv" ,# "mod_fastcgi" , # "mod_proxy" , # "mod_simple_vhost" , "mod_cgi" ,# "mod_ssi" , "mod_usertrack" ,# "mod_expire" , "mod_compress" ,# "mod_webdav" , "mod_openssl" "vendor_path.conf" # force use of the "write" backend (closes: #2401) "write" ## a static document-root, for virtual-hosting take look at the ## server.virtual-* options # 修改网站根目录路径 "/www/" "/cgi-bin/" => "/www/cgi-bin/" )"/luci-static/" => "/www/luci-static/" )## where to send error-messages to # 设置错误日志文件路劲 #server.errorlog = "/var/log/lighttpd/error.log" ## files to check for if .../ is requested "index.html" , "default.html" , "index.htm" , "default.htm" )## mimetype mapping assign = (".pdf" => "application/pdf" ,".class" => "application/octet-stream" ,".pac" => "application/x-ns-proxy-autoconfig" ,".swf" => "application/x-shockwave-flash" ,".json" => "application/json" ,".wav" => "audio/x-wav" ,".gif" => "image/gif" ,".jpg" => "image/jpeg" ,".jpeg" => "image/jpeg" ,".png" => "image/png" ,".svg" => "image/svg+xml" ,".css" => "text/css;charset=UTF-8" ,".html" => "text/html;charset=UTF-8" ,".htm" => "text/html;charset=UTF-8" ,".js" => "text/javascript;charset=UTF-8" ,".txt" => "text/plain;charset=UTF-8" ,".dtd" => "text/xml;charset=UTF-8" ,".xml" => "text/xml;charset=UTF-8" ## Use the "Content-Type" extended attribute to obtain mime type if possible #mimetypes.use-xattr = "enable" ## send a different Server: header "Unknown-Webserver/1.0" "url" ] =~ "\.pdf$" {"disable" ## # which extensions should not be handle via static-file transfer # 这些文件后缀不能通过静态文件来处理 # .php, .pl, .fcgi are most often handled by mod_fastcgi or mod_cgi static -file.exclude-extensions = ( ".php" , ".pl" , ".fcgi" )######### Options that are good to be but not neccesary to be changed ####### ## bind to port (default: 80) 18080 ## bind to localhost (default: all interfaces) #server.bind = "localhost" ## Enable Ipv6 "[::]" "disable" ## error-handler for status 404 #server.error-handler-404 = "/error-handler.php" ## to help the rc.scripts "/var/run/lighttpd.pid" #cgi-bin "remoteip" ] =~ "127.0.0.1" {"/doc/" => "/usr/share/doc/" ,"/images/" => "/usr/share/images/" "url" ] =~ "^/doc/|^/images/" {"enable" "url" ] =~ "/cgi-bin/" {assign = ( "" => "" )assign = (".cgi" => "" "url" ] =~ "^/cgi-bin/" {assign = ( "" => "" )"url" ] =~ "^/cgi/" {assign = ( "" => "" )assign = (".cgi" => "" ####compress module "bzip2" , "gzip" , "deflate" )"/tmp/cache/lighttpd/compress/" "text/json" ,"text/plain" ,"text/css" , "text/xml" , "text/javascript" ,"application/javascript" ,"application/json" )###### virtual hosts ## ## If you want name-based virtual hosting add the next three settings and load ## mod_simple_vhost ## ## document-root = ## virtual-server-root + virtual-server-default-host + virtual-server-docroot or ## virtual-server-root + http-host + virtual-server-docroot ## #simple-vhost.server-root = "/home/weigon/wwwroot/servers/" #simple-vhost.default-host = "grisu.home.kneschke.de" #simple-vhost.document-root = "/pages/" ## ## Format: <errorfile-prefix><status>.html ## -> ..../status-404.html for 'File not found' "/www/error-" ## virtual directory listings #server.dir-listing = "enable" ## send unhandled HTTP-header headers to error-log #debug.dump-unknown-headers = "enable" ### only root can use these options # # chroot() to directory (default: no chroot() ) #server.chroot = "/" ## change uid to <uid> (default: don't care) #server.username = "nobody" # server.upload-dirs = ( "/tmp" ) ## change uid to <uid> (default: don' t care)#server.groupname = "nobody" #### compress module #compress.cache-dir = "/dev/null/" #compress.filetype = ("text/plain" , "text/html" ) #### proxy module ## read proxy.txt for more info #proxy.server = ( # ".php" => ( # "localhost" => ( # "host" => "192.168.0.101" , # "port" => 80 # ) # ) #) #### fastcgi module ## read fastcgi.txt for more info #fastcgi.server = ( # ".php" => ( # "localhost" => ( # "socket" => "/tmp/php-fastcgi.socket" , # "bin-path" => "/usr/local/bin/php" # ) # ) #) #### CGI module #cgi.assign = ( ".pl" => "/usr/bin/perl" , ".cgi" => "/usr/bin/perl" ) #### SSL engine "socket" ] == ":18443" {"/www/" "enable" "/etc/lighttpd/lighttpd.pem" #### status module #status.status-url = "/server-status" #status.config-url = "/server-config" #### usertrack module 3600 "ugwcookie" "; Secure; HttpOnly" #### auth module "url" ] =~ "" {"htdigest" "/etc/lighttpd/lighttpdadmin.user" "" => ("method" => "digest" ,"realm" => "auth" ,"require" => "valid-user" #$HTTP["url" ] =~ "^/gu/" { #auth.backend = "htdigest" #auth.backend.htdigest.userfile = "/etc/lighttpd/lighttpdguest.user" # auth.require = ( # "" => ( # "method" => "digest" , # "realm" => "auth" , # "require" => "valid-user" # ) # ) #} #$HTTP["url" ] =~ "^/usr/" { #auth.backend = "htdigest" #auth.backend.htdigest.userfile = "/etc/lighttpd/lighttpduser.user" # auth.require = ( # "" => ( # "method" => "digest" , # "realm" => "auth" , # "require" => "valid-user" # ) # ) #} #$HTTP["url" ] =~ "^/adm/" { #auth.backend = "htdigest" #auth.backend.htdigest.userfile = "/etc/lighttpd/lighttpdadmin.user" # auth.require = ( # "" => ( # "method" => "digest" , # "realm" => "auth" , # "require" => "valid-user" # ) # ) #} "url" ] =~ "^/su/" {"htdigest" "/etc/lighttpd/lighttpdsuper.user" "" => ("method" => "digest" ,"realm" => "auth" ,"require" => "valid-user" ## read authentification.txt for more info #auth.backend = "plain" #auth.backend.plain.userfile = "lighttpd.user" #auth.backend.plain.groupfile = "lighttpd.group" #auth.require = ( # "/server-status" => ( # "method" => "digest" , # "realm" => "download archiv" , # "require" => "group=www|user=jan|host=192.168.2.10" # ), # "/server-info" => ( # "method" => "digest" , # "realm" => "download archiv" , # "require" => "group=www|user=jan|host=192.168.2.10" # ) #) #### url handling modules (rewrite, redirect, access) #url.redirect = ( "^/$" => "/app/" ) #url.redirect = ( "^/wishlist/(.+)" => "http://www.123.org/$1" ) #### both rewrite/redirect support back reference to regex conditional using %n #$HTTP["host" ] =~ "^/$" { # url.redirect = ( "^/$" => "http://%1/app/" ) #} #### expire module #expire.url = ( "/buggy/" => "access 2 hours" , "/asdhas/" => "access plus 1 seconds 2 minutes" ) #### ssi #ssi.extension = ( ".shtml" ) #### setenv #setenv.add-request-header = ( "TRAV_ENV" => "mysql://user@host/db" ) #setenv.add-response-header = ( "X-Secret-Message" => "42" ) #### variable usage: ## variable name without "." is auto prefixed by "var." and becomes "var.bar" #bar = 1 #var.mystring = "foo" ## integer add #bar += 1 ## string concat, with integer cast as string, result: "www.foo1.com" #server.name = "www." + mystring + var.bar + ".com" ## array merge #index-file.names = (foo + ".php" ) + index-file.names #index-file.names += (foo + ".php" ) #### include #include /etc/lighttpd/lighttpd-inc.conf ## same as above if you run: "lighttpd -f /etc/lighttpd/lighttpd.conf" #include "lighttpd-inc.conf" #### include_shell #include_shell "echo var.a=1" ## the above is same as: #var.a=1 #### webdav #$HTTP["url" ] =~ "^/webdav($|/)" { # webdav.activate = "enable" # webdav.is-readonly = "enable" # webdav.sqlite-db-name = "/var/run/lighttpd-webdav-lock.db" #} #### setenv module # don't allow external content at all "Content-Security-Policy" => "script-src ' self' ' unsafe-eval' ' unsafe-inline' ;", #don' t allow anyone to change the content type"Content-Type-Options" => "nosniff" ,#prevent any communications from being sent over HTTP to the specified domain "Strict-Transport-Security" => "max-age=31536000;includeSubDomains" ,#stop pages from loading when reflected XSS attacks detected "X-XSS-Protection" => "1;mode=block" ,#browser should allow rendering of frame of its in the same origin as the page itself "X-Frame-Options" => "SAMEORIGIN" ,#not to use a previously cached response, not to store the response, the cache must be revalidated on the origin server. "Cache-Control" => "no-cache,no-store,max-age=0,must-revalidate" ,"Pragma" => "no-cache" ,"Expires" => "-1"
源码分析 整个程序的入口(main函数)在server.c文件中。
fdevent 系统
lighttpd中的fdevent系统。fdevent系统主要是处理各种IO事件,在web服务器中,主要就是向socket写数据和从socket读数据。通常,web服务器是IO密集型程序,这就要求在数据的读写上,web服务器必须能够具有很好的性能,不会因为某个socket的阻塞而致使其他socket也被阻塞,否则会大大降低服务器的性能。因此,大部分的web服务器都采用非阻塞IO进行数据的读写。lighttpd通过fdevent系统,采用类似OO中面向对象的方式将对IO事件的处理进行封装,对于不同的IO系统,提供一个统一的接口。
状态机处理
(1)connection.c 文件中的函数说明
connection_handle_read_state(server *srv,connection *con)
在这个函数中,如果数据读取完毕或出错,那么进入相应的状态,如果数据没有读取完毕那么连接的状态不变。此函数读取的数据是HTTP头,在这个函数中根据格式HTTP头的格式判断HTTP头是否已经读取完毕,包括POST数据。
connection_set_state()函数
此函数可以将新建立的连接的状态设置为其他的状态。
http_response_prepare 函数中,
通过对url 的解析,逐步调用插件来处理,对解析的uri 的结果存放在 con -> uri 中。
插件接口
plugins_call_handle_uri_raw
在得到http头中,request line的url地址直接调用,此时url地址没有解码
plugins_call_handle_uri_clean
对url 地址进行解码之后调用
plugins_call_handle_docroot
设置处理请求时的根目录
plugins_call_handle_physical
得到请求资源在服务器上的物理地址,根据这个物理地址做相应的处理
plugins_call_handle_subrequest_start
子请求处理开始
plugins_call_handle_subrequest
处理子请求
参考文章 https://www.cnblogs.com/kernel_hcy/archive/2010/04/07/1706587.html